
20+ Creative DIY Clay Magnet Ideas: Easy & Unique Crafts to Brighten Your Home
Is your refrigerator door looking a little… meh? Maybe just a collection of random takeout menus and that one magnet you got on vacation five years ago? Yeah, mine too sometimes. But guess what? We can totally change that with a bit of clay and a splash of creativity.
I absolutely adore messing around with clay – it’s like adult Play-Doh, but the results actually stick around (literally, in this case!). Making your own DIY clay magnets is not only super fun, but it’s also surprisingly easy, and you end up with unique little pieces of art that brighten up your kitchen, office, or anywhere you need a magnetic touch. Forget generic store-bought stuff; we’re talking personalized, creative crafts made by you.
So, grab a cuppa, get comfy, and let’s chat about transforming simple blobs of clay into 20+ easy and unique magnet ideas that’ll make your fridge the coolest spot in the house. Ready to get those hands a little dirty? 🙂
Before You Get Your Hands Dirty: Your Clay Magnet Toolkit
Alright, before we jump into the fun shapes and designs, let’s quickly cover the basics. Don’t worry, you don’t need a fancy art studio setup. Most of this stuff is easy to find and pretty affordable.
Picking Your Partner in Crime: Clay Types
You’ve basically got two main choices here, and honestly, both work great for magnets. It just depends on your preference and setup.
- Air Dry Clay: This is probably the easiest starting point. No baking needed – you just let it sit out and harden. Perfect if you don’t want to mess with the oven. The downside? It can be a bit more fragile than polymer clay once dry, and you might need to seal it well, especially if you plan on painting it. I find it great for chunkier, simpler designs.
- Polymer Clay: Think brands like Fimo or Sculpey. This stuff is fantastic. It stays soft until you bake it in your regular home oven, comes in a zillion vibrant colors, and is super durable once cured. You can get really fine details with it. The only “hassle” is the baking step, but it’s usually just 15-30 minutes at a low temp. IMO, polymer clay offers more possibilities for detailed and long-lasting magnets.
So, which one to choose? If you’re a total beginner or crafting with kids, air dry clay is super accessible. If you want more durability and color options right out of the packet, polymer clay is your friend. Honestly, try both eventually!
The Essential Gear (No Need to Break the Bank!)
You don’t need a ton of specialized tools to start making cool magnets. Here’s a quick list:
- Your Chosen Clay: Air dry or polymer.
- Rolling Pin: A small craft roller is ideal, but a smooth glass jar works in a pinch. You just need something to flatten the clay evenly.
- Cutting Tools: A craft knife (like an X-Acto) is useful. Cookie cutters are your secret weapon for easy, consistent shapes! You can also use clay sculpting tools, but even a plastic knife or toothpick works for details.
- Small Magnets: Go for neodymium magnets (those small, silver, surprisingly strong ones). Seriously, don’t skimp here. Weak magnets are just sad. Get flat-backed ones.
- Strong Glue: This is crucial! Regular craft glue won’t cut it. You need something heavy-duty like E6000, a good super glue gel, or a two-part epoxy. Trust me on this.
- Optional Goodies:
- Fine-grit sandpaper (for smoothing edges, especially on air dry clay)
- Acrylic paints (for adding color to air dry clay or details to polymer)
- Sealant/Varnish (Gloss or matte – protects your work!)
- Texture tools (stamps, lace, leaves, anything with a cool pattern)
- Fun extras like glitter, mica powder, microbeads (for sprinkles!)
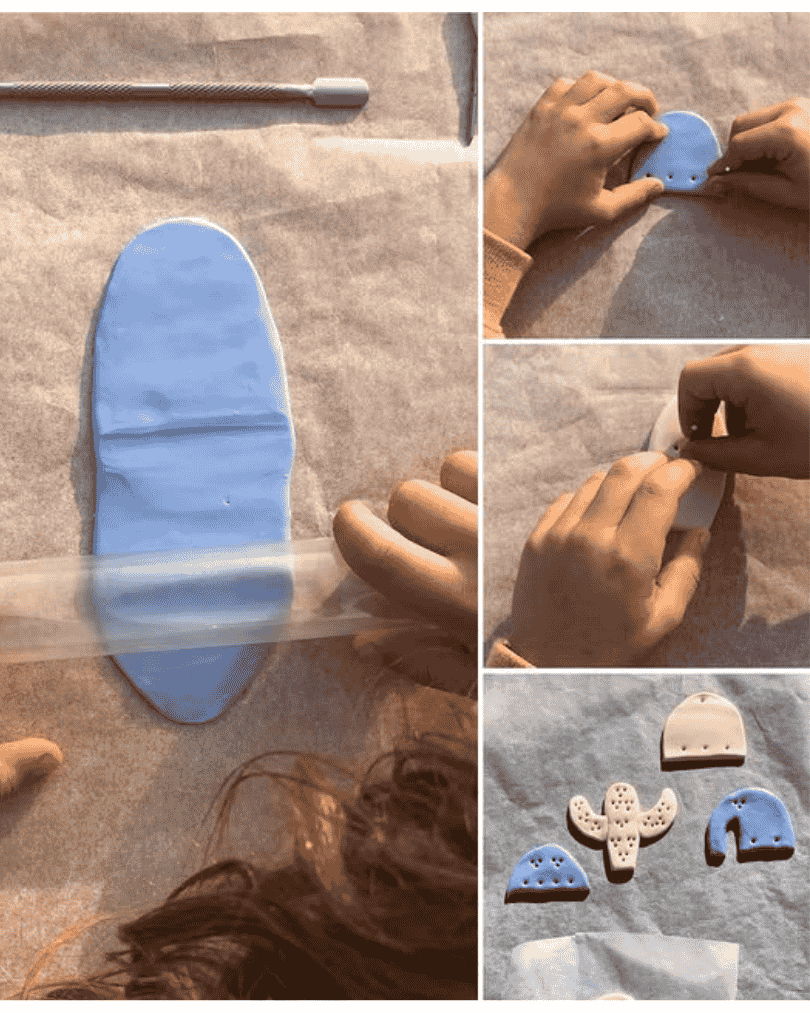
Super Quick Basic Moves
Making the magnets generally involves these steps:
- Condition/Knead: Get the clay soft and workable (especially important for polymer clay).
- Roll It Out: Aim for an even thickness, maybe 1/4 inch (around 5-6mm). Too thin, and it might break; too thick, and it’s chunky.
- Cut Your Shape: Use cutters, knives, or just your hands!
- Add Details/Texture: Now’s the time for stamping, carving, or adding tiny bits.
- Dry or Bake: Follow the instructions for your specific clay type. Let it cool completely if baking.
- Paint/Seal (Optional but Recommended): Add color, then seal it to protect your masterpiece.
- Attach the Magnet: This is the MOST important finishing step! Apply a generous dot of your strong glue to the magnet (or the clay), press it firmly onto the back of your finished piece, and let it cure completely according to the glue instructions (often 24 hours). Don’t rush this!
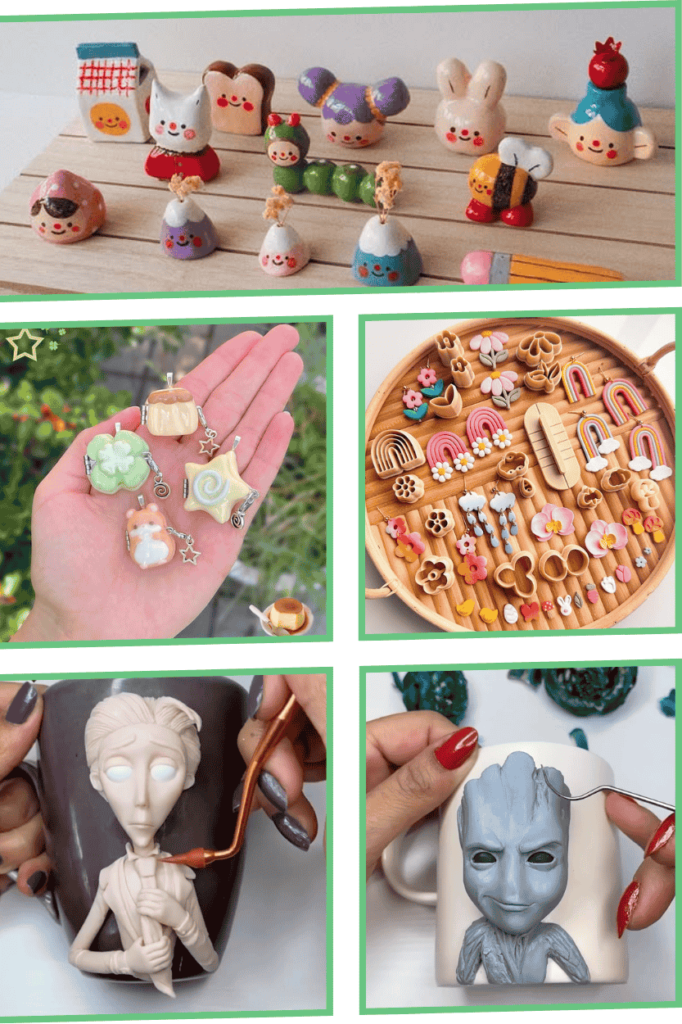
Let’s Get Crafty! 20+ Awesome Clay Magnet Ideas
Okay, here’s the fun part – the inspiration! I’ve grouped these ideas to make it easier to find something that sparks your interest. Remember, these are just starting points. Feel free to mix, match, and go wild!
Channel Your Inner Mother Nature
Love plants and the outdoors? Bring a little bit of that vibe to your fridge.
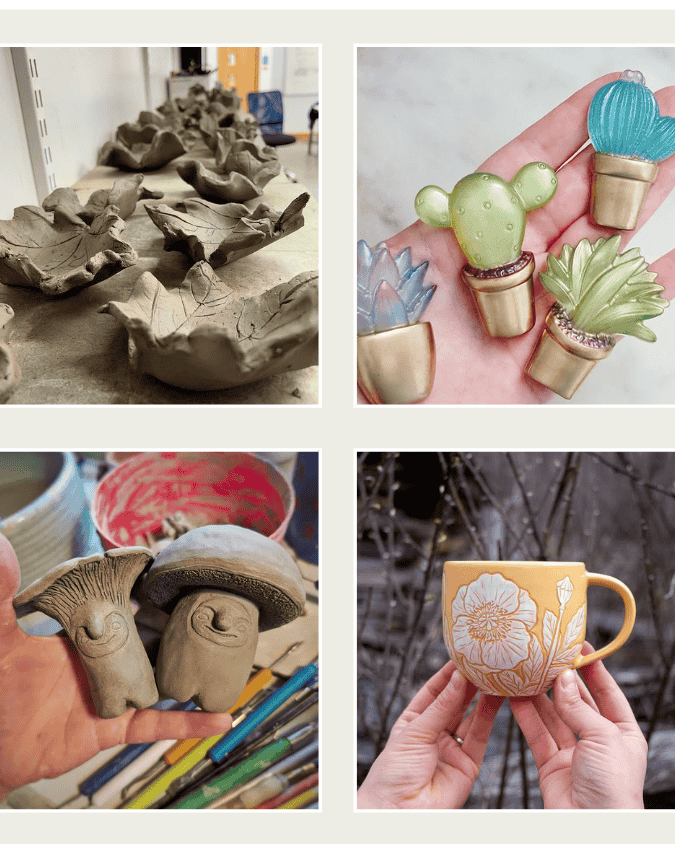
- Miniature Succulent Pots: Sculpt tiny pots and add different shades of green clay for cute little succulents. A bit fiddly, but the result is adorable. (Intermediate)
- Leaf Impressions: Roll out clay and press real leaves into it for amazing texture. Cut around the shape or into simple squares. Easiest way to get stunning detail! (Beginner)
- Cute Mushrooms: Simple red-capped toadstools or earthy brown mushrooms. So whimsical and easy to shape. (Beginner)
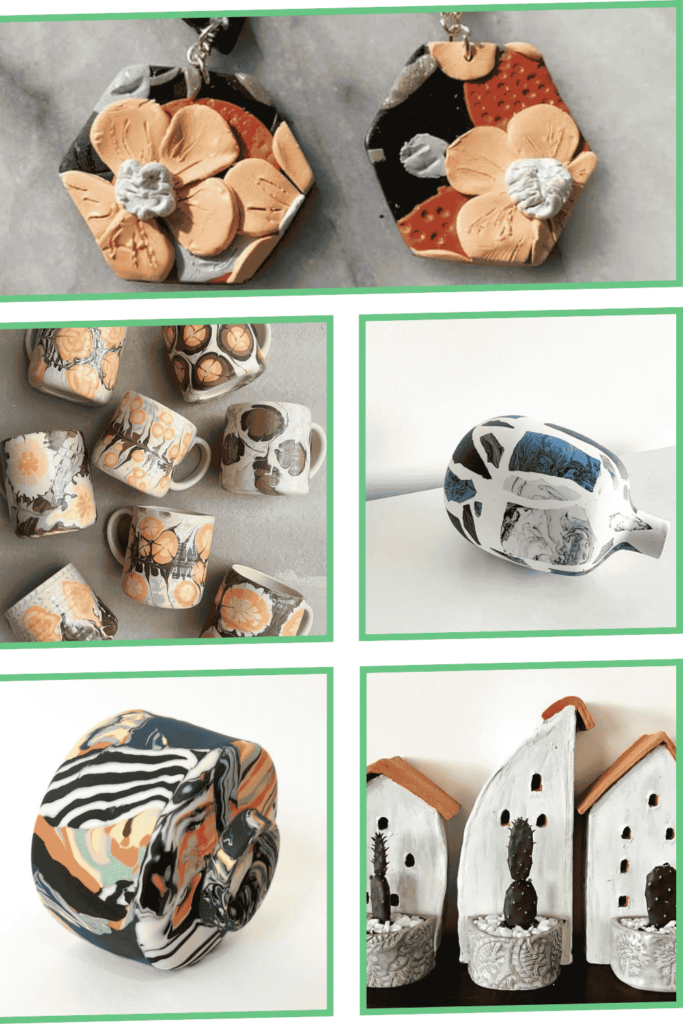
- Honeycomb & Bee: Use a hexagon cutter (or just cut hex shapes) for the honeycomb. Add tiny stripes for a bee. A touch of gold paint makes it pop. (Intermediate)
- Simple Mountain Range: Layer different colors of grey or blue clay, cutting jagged peak shapes. Minimalist and very chic. (Beginner)
Foodie Fun Magnets
Who doesn’t love food? These are always a hit. Just try not to eat them!
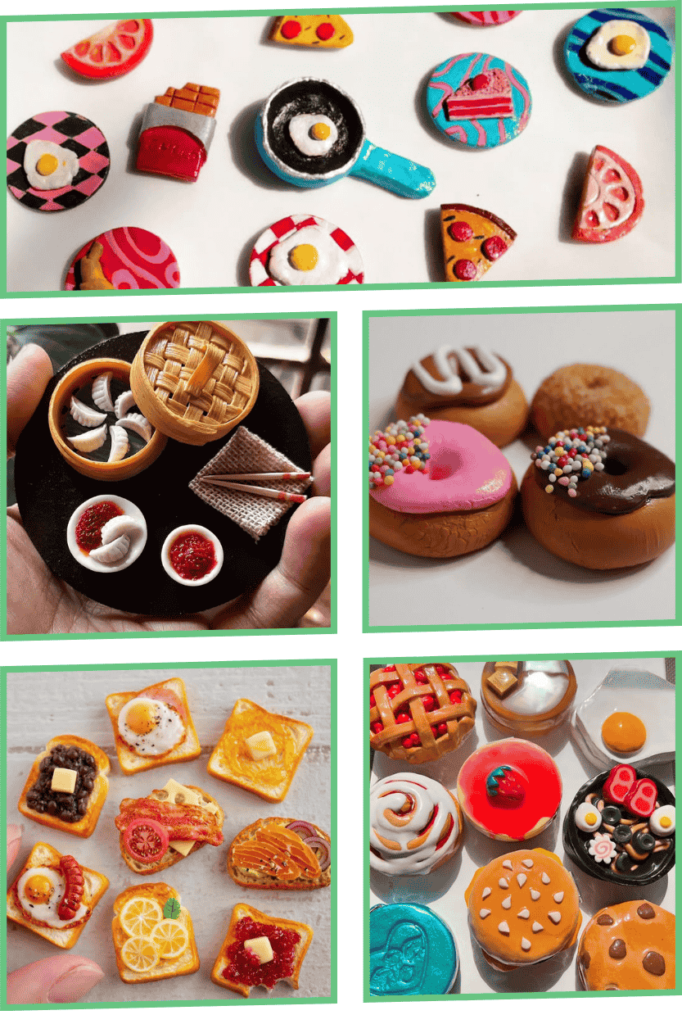
- Tiny Donuts/Cookies: Use tan clay for the base. Add “icing” with puff paint or liquid clay, and microbeads or tiny clay bits for sprinkles. Warning: May induce real snack cravings. (Beginner)
- Avocado Halves: Green clay, a brown pit (add texture!). A coat of gloss varnish makes them look fresh. (Beginner)
- Citrus Slices (Orange, Lemon, Lime): Roll snakes of white clay to divide segments of colored clay. Translucent clay adds realism if you have it. (Beginner/Intermediate)
- Miniature Pizza Slices: A triangle base, red “sauce,” white “cheese,” and tiny pepperoni or veggie toppings. Everyone loves pizza, right? (Intermediate)
- Cute Coffee Cups: Simple cup shapes. Add a tiny heart or steam swirls. Perfect for the coffee addict. (Beginner)
Get Your Geometry On
Modern, clean, and always stylish. Geometric designs are super versatile.
- Marbled Magic: Gently twist together 2-3 colors of clay, then roll flat and cut shapes (circles, squares). Every piece is unique! (Beginner)
- Terrazzo Treasures: Bake tiny chips of colored polymer clay. Then, press these chips into a slab of raw base-color clay, roll smooth, and cut shapes. Looks way fancier than it is. (Intermediate)
- Simple Shapes, Big Impact: Triangles, hexagons, squares. Cut them cleanly. Try painting edges with metallic gold or silver. (Beginner)
- Textured Monochromes: Use one color of clay but add interest by pressing fabric (like lace or burlap) or stamps onto the surface before drying/baking. (Beginner)
- Color Block Coolness: Carefully cut and join pieces of different colored clay to create bold, graphic designs. Needs a steady hand but looks super modern. (Intermediate)
Whimsy & Wonder
Let your imagination run wild with these cute and playful ideas.
- Sleeping Clouds/Stars: Simple cloud or star shapes. Use a fine-tip permanent marker or paint pen to add cute sleeping eyes (^^) after baking/sealing. (Beginner)
- Kawaii Critters: Think simple shapes for foxes, cats, sloths, pandas. Focus on big heads and simple, adorable faces. (Intermediate)
- Little Houses/Gnomes: Tiny cottages or pointy-hatted gnomes. Play with roof colors and door shapes. Adds instant charm. (Beginner/Intermediate)
- Rainbow Arches: Roll out snakes of different colors and curve them into an arch. Use a cutter or template for neatness. Always a cheerful sight! (Beginner)
- Friendly Ghosts: Classic ghost shape. Easy peasy and perfect year-round, not just Halloween. (Beginner)
Make It Yours: Personalized & Practical
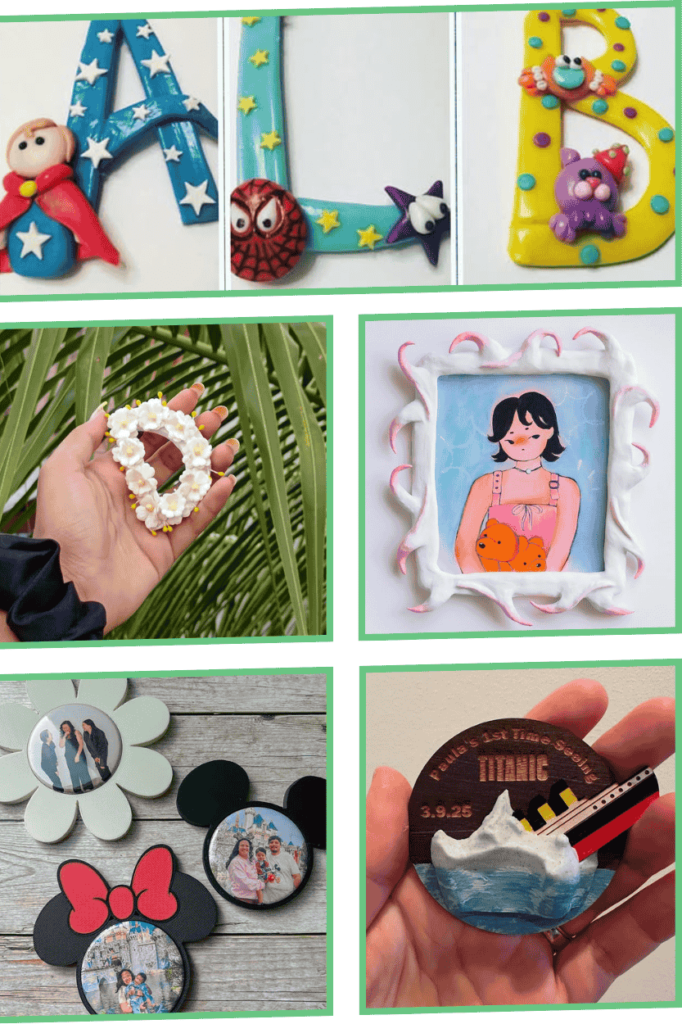
Magnets can be useful too! Or make great personalized gifts.
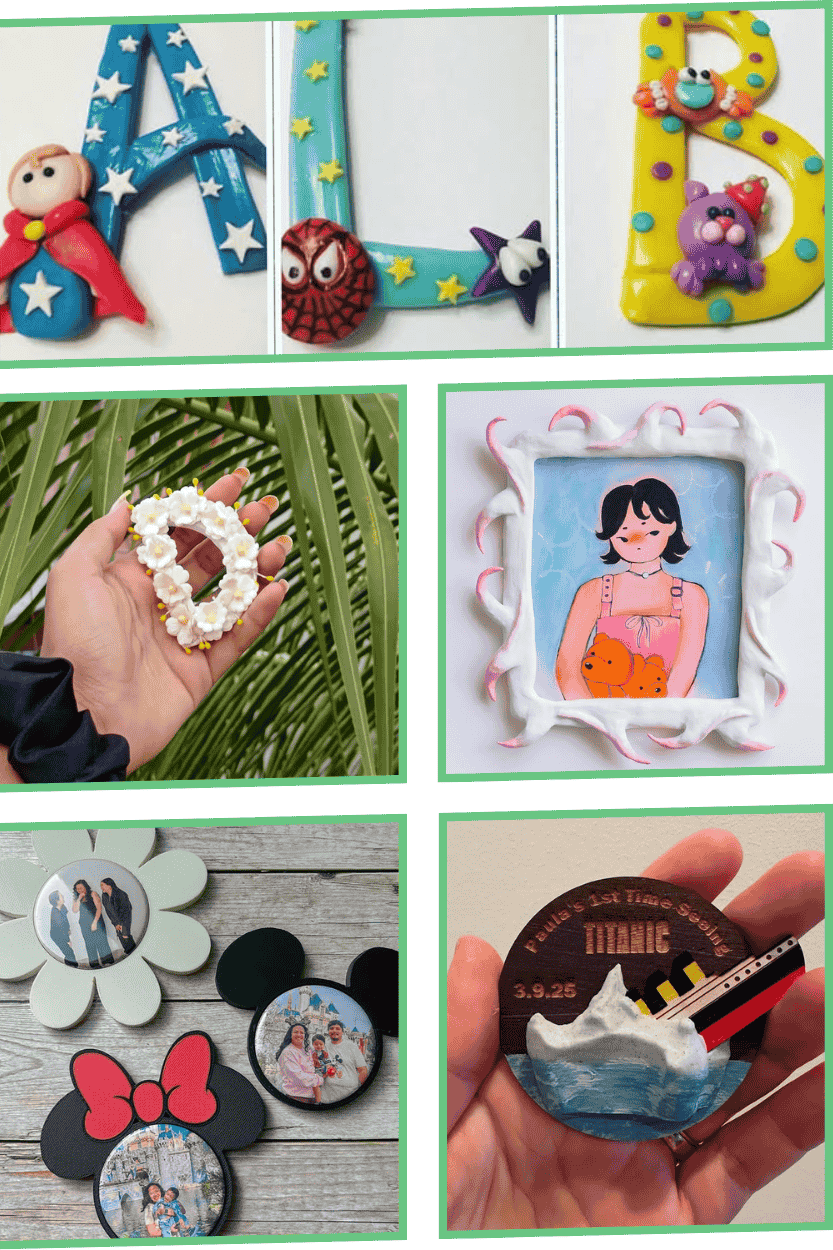
- Initial/Monogram Magnets: Use alphabet cookie cutters or carefully cut out letters. Great for families or as gifts. (Beginner)
- Mini Quote Plaques: Make small rectangles or squares. Stamp letters into the clay before baking/drying, or carefully write short words (“Home,” “Love,” “Coffee”) with a fine paint pen after sealing. (Intermediate)
- Tiny Photo Frames: Create a frame shape (e.g., a rectangle with the middle cut out). After it’s finished, you can glue a tiny trimmed photo behind the opening. (Intermediate)
- Chalkboard Surface Magnets: Paint a smooth clay shape with chalkboard paint (before adding the final sealant around the edges). Let it cure fully. Now you can write little notes! (Intermediate)
Phew! That’s quite a list, right? Hopefully, something there got your creative gears turning!
The Glow-Up: Finishing Touches & Pro Tips
Okay, you’ve made your awesome shape. Now what? Don’t skip these steps – they make all the difference between a craft project and a finished piece you’re proud of.
Smooth Operator: Sanding
Especially with air dry clay, the edges might be a bit rough after drying. Use fine-grit sandpaper to gently smooth them out before painting or sealing. It just looks more polished.
Painting Like a Pro (Even If You’re Not)
If using air dry clay or adding details to polymer, acrylic paints are your best bet. Apply thin coats; you can always add more. Use tiny brushes for details. Let paint dry completely between coats and before sealing. A fun trick? Dry brushing (using a tiny amount of paint on a dry brush) can highlight textures beautifully.
Seal the Deal! (Varnish is Your Friend)
Whether you used air dry or polymer clay, sealing your magnet is a good idea. It protects the paint, makes it easier to wipe clean, and adds durability. You can get gloss varnish (shiny!) or matte varnish (not shiny!). Apply 1-2 thin coats, letting each dry fully. I usually go for a satin or matte finish unless I want something really glossy like food items.
Magnet Attachment: The Make-or-Break Step
I know I mentioned this before, but it bears repeating because it’s SO important. Use a STRONG glue (E6000, Loctite Gel Control, epoxy). Put a decent blob on the magnet or the clay back. Press firmly. And the hardest part? Walk away and let it cure properly. At least 24 hours, seriously. Nothing is more frustrating than having your cool magnet fall off the base because the glue wasn’t ready. Ask me how I know :/
Troubleshooting Tips
Things don’t always go perfectly, and that’s okay! Here are common issues:
- Cracking (Air Dry Clay): Often happens if it dries too quickly. Try slowing the drying process (e.g., cover loosely with plastic wrap for the first day). Ensure clay was kneaded well.
- Warping (Polymer Clay): Can happen if baked too hot or on an uneven surface. Use an oven thermometer to check temps. Bake on a flat tile or cardstock.
- Paint Smudging: Make sure the clay/previous paint layer is BONE DRY before adding more paint or sealant. Patience is key!
- Weak Magnet: You used a wimpy magnet, didn’t you? 😉 Or maybe not enough glue. Use strong neodymium magnets and ensure good glue coverage.
Show Off Your Masterpieces!
You made them, now display them! Your fridge is the obvious spot, but don’t stop there. Think:
- Magnetic whiteboards or chalkboards
- Office filing cabinets
- School lockers
- Metal lamps or shelves
- DIY magnetic strip boards for walls
Handmade magnets also make fantastic, personal gifts! Pop a few in a small organza bag or a tiny box, and boom – thoughtful present sorted.
So, What Will You Create?
See? Making your own DIY clay magnets isn’t scary at all! It’s a wonderfully relaxing and rewarding craft. You get to play with shapes and colors, end up with totally unique pieces for your home, and maybe even discover a new hobby you love.
From simple leaf prints to quirky little food items or personalized initials, the possibilities are endless. The best part is putting your own spin on these ideas. Don’t be afraid to experiment!
Which idea are you itching to try first? Go on, grab some clay, and let’s add some handmade happiness to those magnetic surfaces! Happy crafting!
Related articles:
How to Glaze Air Dry Clay for a Professional Finish